Captivating your audience’s attention is crucial for any kind of success, and videos have become a powerful tool to convey ideas and enhance presentations’ appearances.
Looping videos and slides in PowerPoint presentations can create a dynamic and engaging experience for your viewers.
Therefore, we made this comprehensive guide that will walk you through the process of how to loop video in PowerPoint, ensuring your presentation stands out from the competition.
- What You’ll Need
- How to Loop Videos in PowerPoint – Step by Step
- Advanced Looping Options
- Tips and Tricks for Looping Videos in PowerPoint
- Wrap Up
What You’ll Need
Before diving into the looping process, it’s essential to understand the prerequisites.
The first thing you’ll need to do is to ensure that you have a compatible version of PowerPoint installed on your computer. This would be PowerPoint 2010 or later versions.
Additionally, make sure the video you want to loop in the slideshow is in a format supported by PowerPoint – such as MP4, WMV or AVI.
How to Loop Videos in PowerPoint – Step by Step
Step 1 – Inserting a Video
As already mentioned, it is important to take notice of the video formats supported by PowerPoint.
Luckily, there are quite a few and they include all of the most popular formats like MP4, WMV, and AVI.
For optimal performance, we recommend you use MP4 videos encoded with H.264 video and AAC audio codecs.
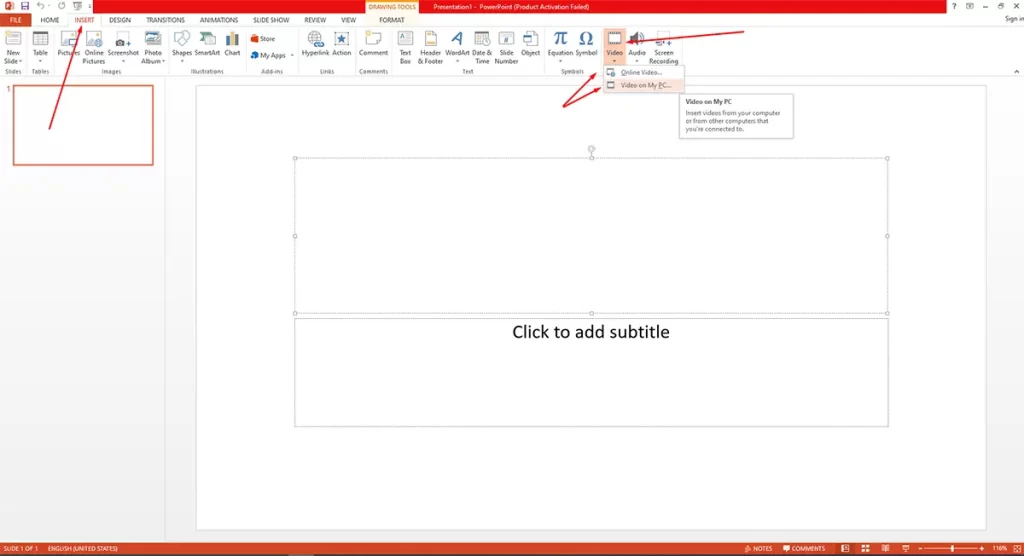
a) Adding a video from your computer
- In your PowerPoint presentation, navigate to the slide where you want to add the video
- Click on the Insert tab in the top menu
- Click on the Video and select Video on My PC or Video from File
- Browse your computer for the video you want, select it and click Insert video
b) Embedding a video from the web
- Again, in your PowerPoint presentation, navigate to the slide where you want to add the video
- Click on the Insert tab in the top menu
- Click on Video and select Online Video or Video from Web
- Enter the video’s URL or search for it using the search bar
- Select the video and click Insert
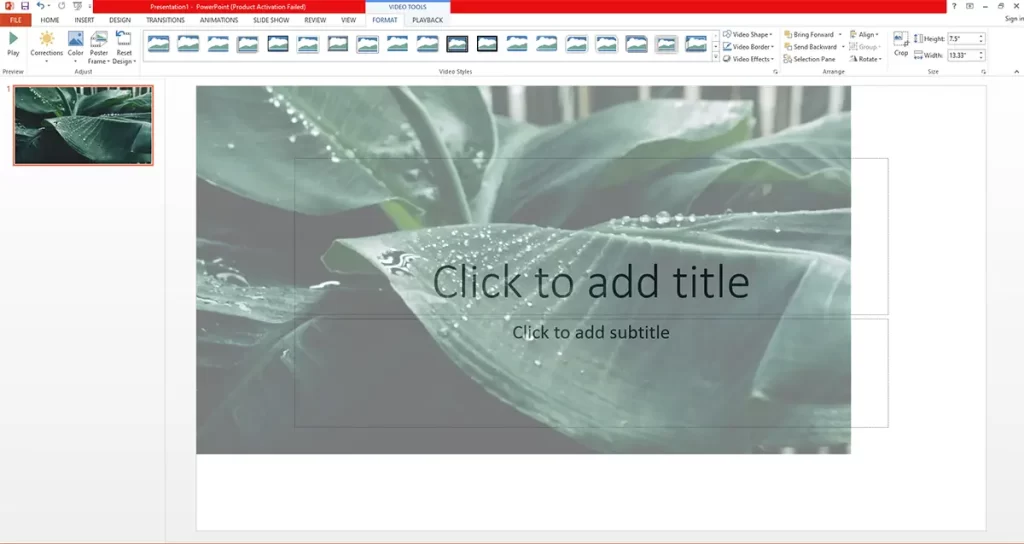
Step 2 – Editing the Video
Before you go looping video, you might want to make some changes to it to make it fit your idea better.
In this step, you can choose to resize and reposition the video, or even apply some styles and effects to make the video more visually pleasing.
a) Resizing and repositioning
- Navigate to one of your PowerPoint slides where you placed the video
- Drag the video to the position you want it to be
- Resize the video by dragging the “handles” in the corners of the video outlines
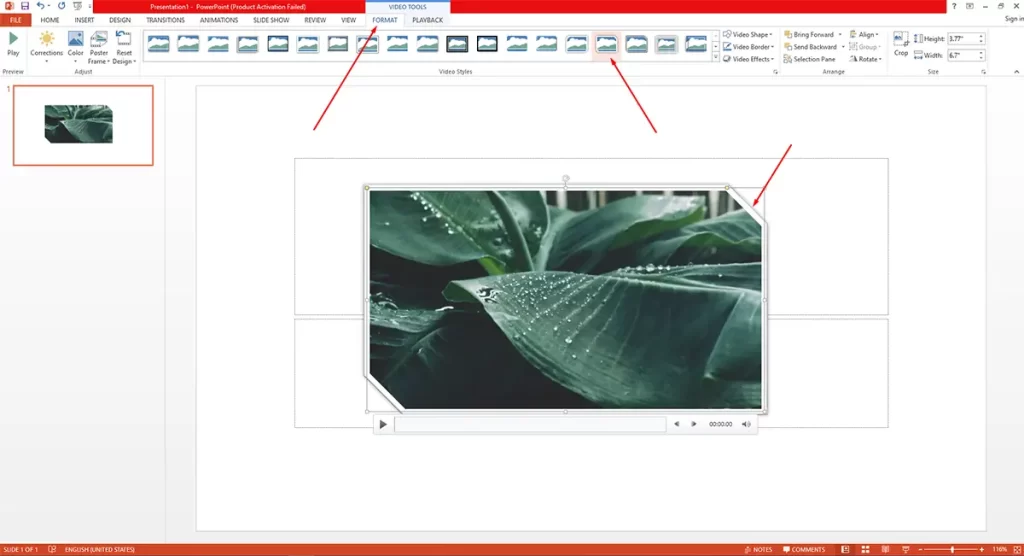
b) Applying styles and effects
- Click on the video in your slide
- Go to the Video Format or Format tab
- Now, you can explore video styles, effects and corrections, and apply the ones you want/like (if any)
Step 3 – Configuring Video Playback Settings
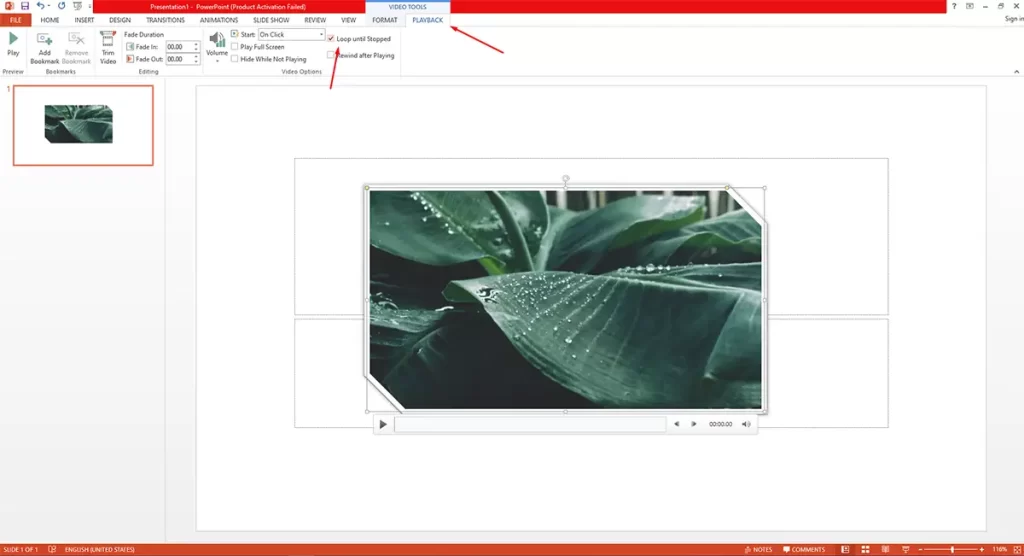
- Click on your video, then click on the Playback tab that will appear in the top menu all the way to the right
- In the Playback tab, find the Loop until Stopped option and check the box next to it to enable video looping
Step 3 – Other Looping Settings and Options
Now, you have your looping slideshow video, but to make it fit your style of presentation even better, there are some more options and settings you can take a look at.
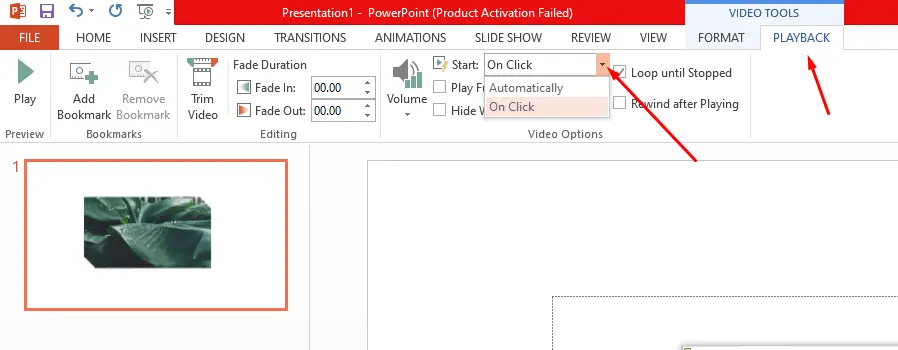
a) Start on click / Start automatically
- In the Playback tab you’re now already familiar with, find the Start dropdown menu
- Select On Click if you want the video to start playing when you click on it
- Click on Automatically if you want the video to start playing video automatically as soon as you reach the slide on which the video is placed and for it to loop continuously
b) Rewind after playing
- In the Playback tab, find the Rewind after Playing option
- Check the box next to it if you want the video to rewind to the beginning after the video ends

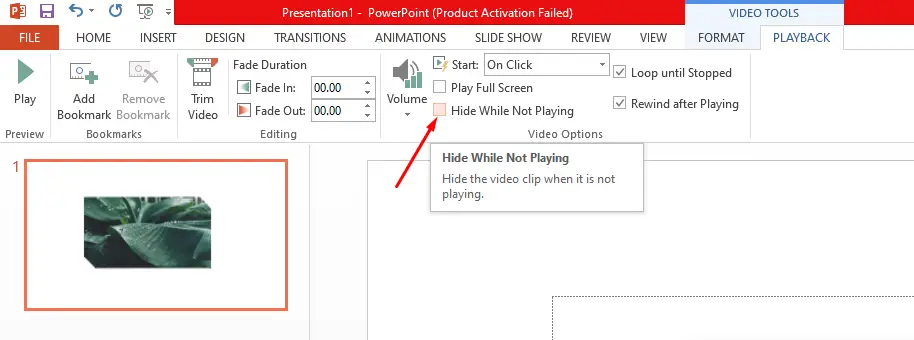
c) Hiding while not playing
- Again, in the Playback tab, find the Hide While Not Playing option
- Check the box next to it if you want the video to be hidden when not playing
Advanced Looping Options
1. Creating Seamless Loops with Video Editing Software
If you want your PowerPoint loop video to be seamless, you should consider using a video editing software to create a perfect loop before you import the video to your presentation.
Some apps, like Adobe Premiere Pro, Final Cut Pro and DaVinci Resolve can help you achieve a smooth transition between the end and the beginning of the new video.
However, keep in mind that these software are not easy to use or particularly intuitive, so you might need to spend some time learning the ins and outs if you’re not already familiar with them.
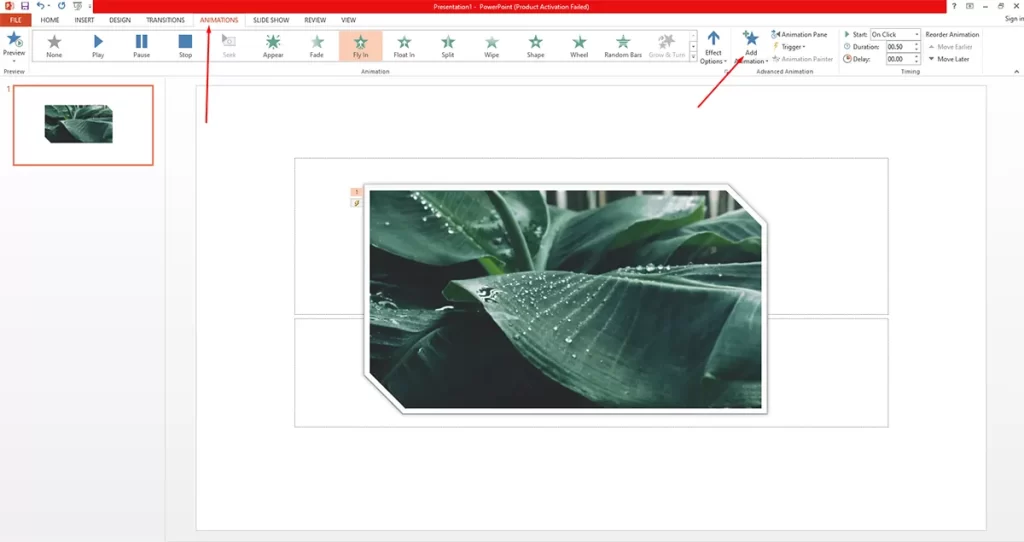
2. PowerPoint Animations and Triggers
Another way to go about video looping is by using PowerPoint’s animations, transitions and triggers.
Here’s how:
- Click on the video you imported and placed in a slide
- Go to Animations tab in the top menu
- Click the Add Animation and select Play from the Media section in the animation gallery
- Click Animation Pane to open the pane on the right side of the screen
- In the Animation Pane, right-click the Play and select Timing
- In the Timing tab, set the Repeat option to Until End of Slide or Until Next Click
You can also use triggers to control when the video starts and stops.
Tips and Tricks for Looping Videos in PowerPoint
As you can see, there is nothing simpler than making a PowerPoint loop video. You can do it in as much as 3 simple steps.
However, if you want to make your videos more appealing, and your videos more eye-catching, there are always some tricks you can use to do so.
Here are a few:
1. Choosing the Right Video
When we’re talking about the “right” video, we primarily mean paying attention to the video length and video content.
So, when you plan to make a continuous loop of your video, consider its length.
Longer videos can be more engaging, sure, but they may also increase the presentation’s file size and affect performance.
On the other hand, shorter videos can loop more seamlessly and are less likely to cause performance issues.
As for the video content, ensure that the video you’re uploading is relevant to your presentation topic and complements the overall message you’re trying to convey.
The video should enhance the audience’s understanding and engagement without being distracting or overwhelming.
2. Compressing Video Files
As we already said, those large videos can mess up the overall impression of your presentation by making it too sluggish and harder to share.
So, to optimize your presentation, consider compressing the files using a dedicated video compression tool or built-in PowerPoint compression option.
- Click on the video in your slide, go to the Video Format or Format tab
- Click on Compress Media or Compress Video
- Choose the level of compression and click Compress
Note that the higher the level of compression, or smaller the size of your presentation, the lower the quality will be.
This doesn’t always mean that your videos will appear pixelated or what have you, but the quality may drop significantly, so there’s one more thing to have in mind when making the presentation in the first place.
3. Testing the Presentation
Before the times comes for you to make your presentation, always test it to ensure the video loops correctly and smoothly.
Run through the entire presentation checking for any playback issues or inconsistencies.
If you do your testing in time, you can safely make all the necessary adjustments and retest it until the loop video works as intended.
4. Looping Videos for Background and Ambience
Looping videos can also be used to create background ambience for your presentation.
For example, a subtle animation or a nature scene can create a visually appealing and engaging atmosphere.
However, you should still to keep in mind that the background video isn’t distracting and aligns well with the overall theme of the presentation.
Wrap Up
Looping videos in PowerPoint, even though extremely simple to do, can significantly enhance your presentations by adding visual interests and engaging your audience further.
By following this simple, yet comprehensive guide, you’ll be well equipped to create seamless, captivating presentations that stand out from those of your competition. Checking grammar with Grammarly for PowerPoint will make your presentation even better.
Remember to choose the right video, optimize the playback settings, and test your presentation thoroughly before delivering it to your audience!
Comments are closed.